By Chef Peter, Expert Chef and Nutritionist at Meta Savory
⏱️ Total Time: 15 Minutes (+ 2 hours chilling) | 👨🍳 Difficulty: Very Easy | 🍲 Serves: 2-4 People
Perfect for: Post-bariatric surgery recovery, weight loss support, gut health, high-protein snacks
I’ll never forget the day Maria walked into my nutrition counseling office, three weeks post-bariatric surgery, looking exhausted and frustrated. “Everything I eat feels too heavy,” she said quietly. “I just want something light that doesn’t make me feel sick.”
That’s when I introduced her to this bariatric gelatin recipe – a simple gelatin weight loss trick recipe that’s been transforming my patients’ recovery journeys for over 15 years.
Fast forward six months, and Maria had not only reached her weight loss goals but had also started a support group teaching other bariatric patients how to make this simple, protein-rich snack. She called it her “recovery lifesaver” and even shared her bariatric gelatin recipe reviews with hundreds of other patients online.
Here’s the thing about post-bariatric recovery that most people don’t talk about: finding foods that are gentle enough for your healing stomach while still providing the protein you desperately need is incredibly challenging. This gelatin trick recipe solves that problem with just three ingredients and about 15 minutes of your time.
Why This Recipe Changed Everything for My Patients
Over my 15 years working with bariatric patients, I’ve seen every diet struggle imaginable. The early weeks after surgery are particularly tough. Your stomach is healing, your appetite is unpredictable, and the thought of forcing down another protein shake can make you want to cry.
That’s exactly why I developed this bariatric gelatin recipe. You might have seen similar gelatin trick recipe weight loss TikTok videos going viral, but many of those versions miss crucial details about proper preparation and bariatric-specific needs. This version is specifically designed for post-surgical patients and anyone serious about healthy weight loss.
Unlike thick shakes or heavy foods, this gelatin is incredibly gentle on your healing stomach. It slides down easily, doesn’t cause that uncomfortable “full” feeling too quickly, and actually tastes like something you want to eat rather than something you have to choke down.
The protein from the gelatin supports your healing tissues, helps maintain muscle mass during weight loss, and keeps you feeling satisfied between meals. Plus, the collagen in quality gelatin supports your skin elasticity – something that becomes really important as you lose weight rapidly.
What really makes this recipe special is its flexibility. Feeling nauseous? Make it with just water and a squeeze of lemon. Craving something sweet? Add a splash of sugar-free juice. Need more protein? Stir in unflavored collagen powder. It adapts to exactly where you are in your recovery journey.
What Makes This Different from Regular Jello
Let me be clear: this isn’t just regular Jell-O from a box. Those pre-packaged mixes are loaded with sugar, artificial colors, and barely any actual protein. When I recommend this to my patients, we’re talking about real, unflavored gelatin – the kind that’s pure protein from collagen.
Think of it this way: regular Jell-O is a dessert that happens to have some gelatin in it. This bariatric gelatin recipe is a therapeutic food that happens to taste like dessert. That’s a huge difference when you’re recovering from surgery and every bite needs to support your healing.
The collagen protein in quality gelatin provides all nine essential amino acids your body needs. It supports your gut lining (critical after bariatric surgery), helps reduce joint pain, and gives your body the building blocks it needs to maintain muscle while losing fat.
I’ve watched countless patients struggle with the “protein first” rule after surgery. They’re supposed to get 60-80 grams of protein daily, but everything protein-rich feels too heavy. This recipe gives them 7 grams of pure, easily digestible protein per serving without any of that uncomfortable fullness.
The Science Behind Why This Bariatric Gelatin Recipe Works
As both a chef and nutritionist, I love when something this simple has solid science backing it up. Gelatin is essentially cooked collagen, and your body breaks it down into amino acids that serve multiple purposes during recovery.
First, there’s the glycine content. This amino acid helps calm your digestive system and supports the mucosal lining of your gut – exactly what you need when your stomach is healing from surgery. Many of my patients report less nausea and better digestion when they add this gelatin to their daily routine.
Second, gelatin helps you stay hydrated. After bariatric surgery, getting enough fluids can be challenging because you can’t gulp down water like you used to. This recipe provides hydration in a form that’s easy to consume and doesn’t leave you feeling waterlogged.
Third, the protein satiety factor is real. Even though each serving is only about 35 calories, the protein content sends strong “I’m satisfied” signals to your brain. My patients consistently tell me they snack less in the evenings when they have this gelatin in the afternoon.
Research published by the National Institutes of Health shows that collagen supplementation supports tissue repair and reduces joint pain. For bariatric patients dealing with rapid weight loss and the physical stress of major surgery, these benefits matter tremendously.

Essential Ingredients You’ll Need
One of my favorite things about this bariatric gelatin recipe is how minimal the ingredient list is. When patients ask me “what are the 3 ingredients in the gelatin trick?”, I tell them it’s beautifully simple: you don’t need to hunt down exotic items or spend a fortune at health food stores.
These gelatin weight loss trick ingredients are available at any grocery store, and you probably already have some of them in your pantry. While you might find variations like Dr. Ashton’s gelatin recipe or Dr. Hyman’s gelatin recipe ingredients online, my version is specifically optimized for bariatric patients based on 15 years of clinical experience.
The Core Three Ingredients:
- 1 tablespoon unflavored gelatin powder (I always recommend grass-fed when possible – the quality difference is noticeable)
- 1 cup water, divided (filtered water tastes better, but tap water works fine)
- 1 cup sugar-free flavored liquid (options below)
Liquid Options for Flavor:
- Sugar-free fruit juice (diluted if too sweet)
- Flavored electrolyte drinks (Gatorade Zero, Powerade Zero)
- Herbal tea (cooled)
- Crystal Light or similar sugar-free drink mixes
- Bone broth (for a savory version – surprisingly good!)
Optional Boosters:
- 1 scoop unflavored collagen powder (adds 10g more protein)
- 2-3 tablespoons plain Greek yogurt (for a creamy “fluff” texture)
- Fresh lemon or lime juice (brightens any flavor)
- Sugar-free vanilla or almond extract (just a few drops)
- Soft berries (if you’re past the early recovery stage)
A word about gelatin quality: not all gelatin is created equal. I tell my patients to look for gelatin from grass-fed sources. It costs a bit more, but the amino acid profile is superior, and you’re not getting any of the antibiotics or hormones that can be present in conventional gelatin.
Avoid gelatin from certain fruits initially – raw pineapple, kiwi, papaya, and mango contain enzymes that prevent gelatin from setting. If you want these flavors in your bariatric gelatin recipe, use cooked versions or juice instead of fresh fruit.
Step-by-Step Instructions: Bariatric Gelatin Recipe
I’ve taught this gelatin trick recipe to hundreds of patients, and I always emphasize one thing: the “blooming” step is crucial. Skip it, and you’ll end up with clumpy, grainy gelatin that nobody wants to eat. Follow these steps exactly, and you’ll get smooth, professional results every time.
Step 1: Bloom Your Gelatin (5 Minutes)
Pour half a cup of cold water into a medium bowl. Sprinkle your tablespoon of gelatin powder evenly over the surface of the water. Don’t just dump it in one spot – you want it distributed across the entire surface.

Now here’s the important part: leave it alone. I mean it. Don’t stir it, don’t poke it, just let it sit for 5 full minutes. You’ll see the gelatin absorb the water and swell up, creating what looks like a weird, spongy mass. That’s exactly what you want.
This blooming process allows the gelatin particles to hydrate evenly. Skip this step, and you’ll end up with lumps that never fully dissolve. I’ve seen too many discouraged patients give up because they rushed through blooming and got a grainy texture.
Step 2: Dissolve Completely
Heat your remaining half cup of water until it’s very hot but not quite boiling. I usually microwave it for about 90 seconds, but you can heat it on the stove if you prefer.
Pour this hot water over your bloomed gelatin and stir gently but thoroughly. Keep stirring for about a minute until every bit of gelatin has dissolved. You shouldn’t see any granules or lumps – it should look completely clear and smooth.
This is your quality check moment. Hold the bowl up to the light and look through it. See any particles? Keep stirring. The clearer your liquid at this stage, the better your final texture will be.
Step 3: Add Your Flavor
Now comes the fun part – adding flavor. Pour in your chosen liquid (juice, electrolyte drink, tea, whatever you’re using) and stir until everything is well combined.
Taste it at this point. Too sweet? Add a splash of water or lemon juice. Not sweet enough? Add a tiny bit of stevia or monk fruit sweetener. This is your chance to adjust before it sets.
If you’re adding extras like collagen powder or Greek yogurt, do it now. Whisk them in thoroughly so they’re completely incorporated. For the yogurt version (which creates that creamy “bariatric fluff” texture my patients love), use an immersion blender or regular blender for the smoothest results.
Step 4: Pour and Chill
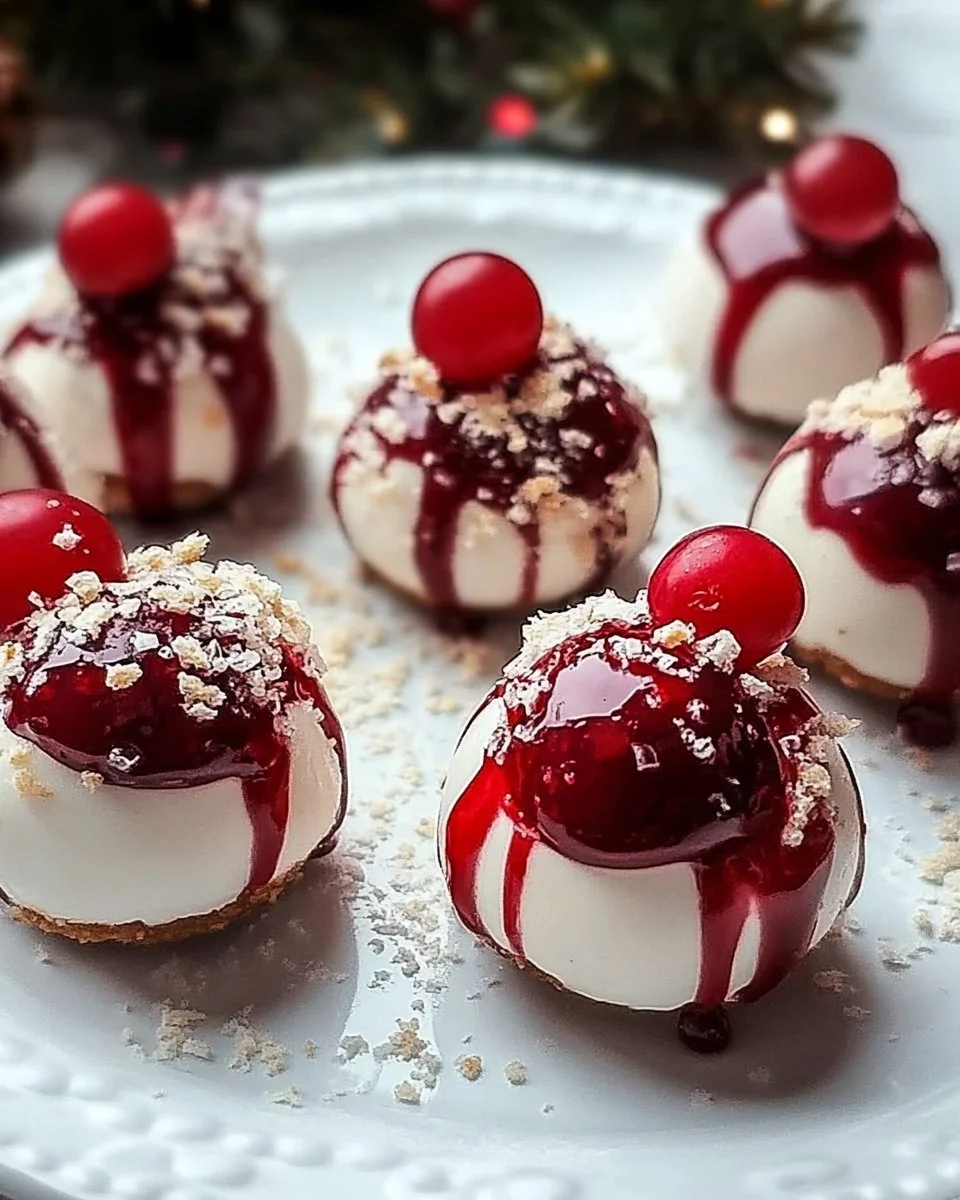
Pour your mixture into small cups, ramekins, or a glass dish. I like using 4-ounce containers because they’re the perfect portion size for post-bariatric patients. You can also use silicone molds for fun shapes – my patients’ kids love the star and heart shapes.
Carefully transfer everything to your refrigerator. Try to keep it level so it sets evenly. Now for the hardest part: waiting. You need at least 2 hours for it to set properly, but I usually recommend 3-4 hours or overnight for the best texture.
Don’t try to rush this by putting it in the freezer. Freezing changes the texture and can make it grainy when it thaws. Patience pays off here.
Step 5: Enjoy and Store
Once set, your bariatric gelatin recipe is ready to eat. It should be firm but jiggly, not rubbery. If you can turn a spoon upside down and the gelatin stays on it, you’ve got the perfect consistency.
Store covered in the refrigerator for up to 5 days. I tell my patients to make a big batch on Sunday and portion it out for the week. It’s a game-changer when you have healthy, protein-rich snacks ready to grab.

Five Delicious Variations
After years of working with patients and reading countless bariatric gelatin recipe reviews, I’ve developed several variations of this gelatin weight loss trick recipe that address different needs and preferences. Here are my most popular versions:

Variation 1: Citrus Sunshine (My Personal Favorite)
Use half water and half sugar-free lemonade or orange drink. Add a tablespoon of fresh lemon juice and a tiny bit of lemon zest after the gelatin dissolves. The brightness of citrus helps combat post-surgery nausea, and many patients tell me this version helps them stay hydrated because it’s so refreshing.
Variation 2: Berry Protein Boost
Make the base recipe with sugar-free berry juice. Once dissolved and cooled slightly, add 1 scoop of unflavored collagen powder and 2 tablespoons of Greek yogurt. Blend until smooth. This version gives you nearly 20 grams of protein per serving – perfect for patients struggling to meet their protein goals.
When you’re cleared for soft foods (usually weeks 3-4 post-surgery), you can fold in a few mashed fresh berries just before chilling for extra flavor and fiber.
Variation 3: Tropical Paradise
Use sugar-free tropical punch or coconut water mixed with a splash of pineapple juice (remember, use juice not fresh pineapple). Add a few drops of coconut extract. This one transports you to the beach and makes taking your protein feel less like a chore.
Variation 4: Creamy Vanilla “Fluff”
This is the closest thing to dessert while still being bariatric-appropriate. Use water as your base liquid, but add 1/4 cup of Greek yogurt, 1 teaspoon of vanilla extract, and a pinch of cinnamon. Blend everything together after the gelatin dissolves. The result is like a light mousse that my patients absolutely crave.
Some patients add a tiny bit of sugar-free pudding mix to this version for extra flavor. Just be mindful of the added carbs if you’re in early recovery.
Variation 5: Savory Bone Broth Version
Not everything needs to be sweet. For patients who are tired of sweet flavors, I recommend making this with high-quality bone broth instead of juice. Use 1 cup of warm bone broth as your liquid, add a pinch of sea salt, some dried herbs (thyme works beautifully), and maybe a tiny bit of miso paste for umami.
This savory version is incredibly soothing, supports gut healing even more than the sweet versions, and provides additional minerals your body needs during recovery.
Storage and Meal Prep Strategies
One of the biggest challenges my bariatric patients face is consistency. You know what you should eat, but actually preparing it when you’re tired or busy? That’s where meal prep becomes essential with this bariatric gelatin recipe.
Here’s my foolproof system: every Sunday evening, I have my patients make a double batch. Use two different flavors so you don’t get bored. Portion them into small containers – I like the 4-ounce glass jars with lids because they’re reusable and you can see what’s inside.
Label them with the date and flavor. Your gelatin stays fresh for 5 days in the refrigerator, so Sunday’s batch takes you through Thursday. On Wednesday evening, make another batch for Friday through Monday. This rotation ensures you always have fresh gelatin available.
Some patients ask about freezing. Technically you can freeze gelatin, but the texture changes when you thaw it – it becomes more watery and grainy. I don’t recommend it. The refrigerated version tastes so much better and lasts plenty long enough that freezing isn’t necessary.
For travel, these little containers are perfect. They’re allowed through TSA security (I’ve had patients take them on planes), and they stay good in a cooler with an ice pack for several hours. I’ve had patients bring them to work, on road trips, and even on vacation.
Common Mistakes and How to Avoid Them
After teaching this to countless patients, I’ve seen the same mistakes pop up repeatedly. Let me save you some frustration:
Mistake 1: Not Blooming Long Enough
I can’t stress this enough – give your gelatin the full 5 minutes to bloom. I know it seems like forever when you’re standing there watching it, but it matters. Set a timer on your phone and walk away. Come back when it beeps. Patients who rush this step always end up disappointed with the texture.
Mistake 2: Using Boiling Water
Hot water, yes. Boiling water, no. Water that’s too hot can actually start to break down the gelatin proteins, giving you a weaker set. Heat your water until it’s steaming and very hot to the touch, but not at a rolling boil. If you accidentally boil it, let it cool for 30 seconds before adding it to your bloomed gelatin.
Mistake 3: Adding Fresh Pineapple, Kiwi, or Papaya
These fruits contain enzymes (bromelain in pineapple, actinidin in kiwi, papain in papaya) that literally digest the protein bonds in gelatin. Your mixture will never set if you add fresh versions of these fruits. Cooked or canned versions are fine because heat destroys the enzymes.
Mistake 4: Not Measuring the Gelatin
I’ve had patients eyeball the gelatin amount and end up with either rubber or soup. Use an actual measuring spoon. One level tablespoon per 2 cups of liquid is the magic ratio. More gelatin makes it rubbery, less makes it too soft and prone to melting.
Mistake 5: Trying to Speed Up Setting in the Freezer
The freezer seems like a shortcut, but it ruins the texture. Ice crystals form and break up the gelatin structure. When it thaws, you get a watery, grainy mess instead of that smooth, jiggly texture you’re going for. Just be patient and let it set properly in the refrigerator.
How This Fits Into Your Bariatric Diet Stages
One question I get constantly: “When can I start eating this after surgery?” The answer depends on your surgical protocol, but here’s how I typically guide my patients:
Stage 1 (Clear Liquids – Days 1-3): Not yet. Stick to your surgeon’s clear liquid protocol.
Stage 2 (Full Liquids – Days 4-14): This is usually when you can start with the bariatric gelatin recipe. Make it very smooth with just gelatin and flavored water. No chunks, no yogurt additions. Keep it simple and easy to digest.
Stage 3 (Pureed Foods – Weeks 3-4): Now you can add the Greek yogurt for that creamy fluff texture. This provides extra protein when you need it most. You can also try the bone broth version.
Stage 4 (Soft Foods – Weeks 5-8): Add soft berries if you want. Experiment with different flavors and textures. This is when it becomes really fun.
Stage 5 (Regular Foods – 2+ Months): This remains a fantastic high-protein snack for life. Many of my patients who are years post-op still make this regularly because it’s such an easy way to get protein without feeling stuffed.
Always, always follow your surgical team’s specific guidelines. Every program is slightly different, and your surgeon knows your individual case best.
The Gut Health Connection
Here’s something fascinating that I discuss with all my bariatric patients: gelatin is one of the best things you can consume for gut healing. After surgery, your digestive system needs all the support it can get.
The amino acids in gelatin, particularly glycine and glutamine, help repair and maintain the mucosal lining of your gut. Think of it like spackling compound for tiny holes in your intestinal wall. This is especially important post-surgery when your gut is healing and relearning how to function with its new configuration.
Many patients report less acid reflux, less nausea, and better overall digestion when they add this to their daily routine. According to the American Society for Metabolic and Bariatric Surgery, supporting gut health during recovery is crucial for long-term success. It’s not magic – it’s just giving your body the specific nutrients it needs to repair itself.
The gelatin also supports beneficial gut bacteria. A healthy gut microbiome helps with everything from mood regulation to immune function to, yes, continued weight loss. It’s one of those beautiful situations where a simple food provides multiple benefits.
Beyond Weight Loss: Additional Benefits
While this recipe started as a solution for post-surgical protein needs, I’ve noticed my patients experience several unexpected benefits:
Better Sleep: The glycine in gelatin has a calming effect on the nervous system. Several patients have told me they sleep more soundly when they have a small serving of this in the evening.
Improved Joint Comfort: The collagen supports cartilage health. Patients losing significant weight often report joint pain (from years of extra weight), and many notice improvement after adding gelatin regularly.
Stronger Nails and Hair: Rapid weight loss can stress your hair and nails. The protein and specific amino acids in gelatin help minimize hair loss and keep nails from becoming brittle – common complaints in the bariatric community.
Better Skin Elasticity: While no food can prevent loose skin entirely after major weight loss, the collagen in gelatin supports skin health from the inside. It won’t work miracles, but every bit helps.
Reduced Cravings: This is the big one. The protein content helps stabilize blood sugar and reduces those intense cravings that can derail your progress. Patients consistently report fewer evening snack attacks when they have this in the afternoon.
Frequently Asked Questions About This Gelatin Weight Loss Trick
What is the bariatric gelatin recipe for weight loss?
The bariatric gelatin recipe for weight loss uses 1 tbsp unflavored gelatin powder, 1 cup water (cold + hot), and sugar-free flavor like Crystal Light or lemon juice. Bloom in cold water, dissolve in hot water (180-190°F), then chill for a 35-calorie, protein-packed snack that supports post-op recovery and satiety.
Is bariatric gelatin recipe safe for weight loss?
Yes, the bariatric gelatin recipe provides 6-7g pure protein per tbsp with zero carbs/fat, ideal for bariatric patients. It curbs cravings, aids gut healing, and promotes fullness during calorie restriction or surgery recovery.
What not to mix with bariatric gelatin recipe?
Avoid fresh pineapple, kiwi, papaya, mango, figs in your bariatric gelatin recipe—their enzymes prevent setting; use cooked/canned versions. No boiling water; add lemon juice, salt, or collagen only after dissolving.
Final Thoughts: Bariatric Gelatin Recipe
After fifteen years of working with bariatric patients, I’ve seen a lot of trendy recipes come and go. This bariatric gelatin recipe has stayed in my recommendations because it simply works. It’s not flashy, it’s not Instagram-worthy (though you can make it pretty if you want), but it solves real problems that real people face during recovery.
The patients who do best after bariatric surgery are the ones who find simple, sustainable habits they can maintain long-term. This gelatin weight loss trick recipe is exactly that – simple enough to make when you’re exhausted, flexible enough to adapt to your changing needs, and effective enough to support your health goals.
Remember Maria from the beginning of this article? She still makes this weekly, two years post-surgery and at her goal weight. It’s become such a habit that she doesn’t think about it anymore – she just makes it every Sunday along with her meal prep. That’s the kind of sustainable habit that creates lasting success. Her positive bariatric gelatin recipe reviews have inspired hundreds of other patients in her support group.
Ready to try more bariatric-friendly recipes? Check out our collection of weight loss recipes designed specifically for post-surgical patients and anyone focused on healthy, sustainable eating. Every recipe is tested, nutritionist-approved, and actually tastes good – because food should support your health without sacrificing enjoyment.
Have you tried this gelatin trick recipe? I’d love to hear about your experience – which flavor variation became your favorite? Share in the comments below, and if you found this helpful, please share it with others in the bariatric community. We’re all in this together, and sharing what works makes everyone’s journey a little easier.
Print
Bariatric Gelatin Recipe: 5 Easy Steps for Quick Recovery
- Total Time: 15 minutes (plus 2-3 hours chilling)
- Yield: 2–4 servings 1x
Description
This bariatric gelatin recipe is a light, protein-rich snack perfect for post-surgery recovery, gut health, and weight management. Just 3 ingredients, ready in 15 minutes, incredibly easy to digest.
Ingredients
1 tablespoon unflavored gelatin powder (preferably grass-fed)
1 cup water, divided (½ cup cold, ½ cup hot)
1 cup sugar-free flavored liquid (options below)
Flavor Options:
Sugar-free fruit juice (diluted if needed)
Flavored electrolyte drinks (Gatorade Zero, Powerade Zero)
Herbal tea (cooled)
Crystal Light or sugar-free drink mixes
Bone broth (for savory version)
Optional Protein Boosters:
1 scoop unflavored collagen powder (adds 10g protein)
2–3 tablespoons plain Greek yogurt (for creamy texture)
Fresh lemon or lime juice (brightens flavor)
Sugar-free vanilla or almond extract (few drops)
Soft berries (if cleared for soft foods)
Instructions
1. Pour ½ cup COLD water into a medium bowl. Sprinkle gelatin evenly over the water surface. Let sit undisturbed for 5 full minutes to bloom. Don’t skip this step – it’s crucial for smooth texture.
2. Heat remaining ½ cup water until very hot but not boiling (about 90 seconds in microwave). The water should be steaming but not at a rolling boil.
3. Pour hot water over bloomed gelatin and stir gently but thoroughly for about 1 minute until completely dissolved. The mixture should be clear with no granules visible.
4. Add your chosen flavored liquid (juice, electrolyte drink, tea, etc.) and stir until well combined. Taste and adjust sweetness if needed with lemon juice or sugar-free sweetener.
5. If adding optional boosters (collagen powder or Greek yogurt), add them now and whisk or blend until completely smooth.
6. Pour mixture into small cups, ramekins, or 4-ounce containers. Use silicone molds for fun shapes if desired.
7. Refrigerate for at least 2-3 hours or overnight until completely set. The gelatin should be firm but jiggly, not rubbery.
8. Serve chilled. Store covered in refrigerator for up to 5 days. Do not freeze as it changes the texture.
Notes
Gelatin Quality: Use grass-fed unflavored gelatin for best nutritional benefits and cleanest ingredient profile.
Blooming is Essential: The 5-minute blooming step in COLD water is crucial. Skipping or rushing this creates grainy, lumpy gelatin.
Avoid These Fruits: Do not use fresh pineapple, kiwi, papaya, or mango as they contain enzymes that prevent gelatin from setting. Cooked or canned versions are fine.
Bariatric Diet Stages: Typically safe starting at Stage 2 (full liquids), but always follow your surgical team’s specific guidelines. Add yogurt and berries only when cleared for pureed/soft foods.
Protein Content: Base recipe provides 7g protein per serving. Add collagen powder for 17g total. Add Greek yogurt for 20g total.
Texture Troubleshooting: Too soft? Add ½ tsp more gelatin next time. Too rubbery? Reduce gelatin slightly or add more liquid.
Meal Prep: Make double batches on Sunday. Portion into small containers and refrigerate for easy grab-and-go snacks all week.
Diabetic-Friendly: When made with sugar-free liquids, this is safe for diabetics. The protein helps stabilize blood sugar.
Never Use Boiling Water: Water that’s too hot breaks down gelatin proteins. Use very hot but not boiling water.
Storage: Refrigerate up to 5 days covered. Do not freeze – it ruins the texture when thawed.
- Prep Time: 10 minutes
- Cook Time: 5 minutes
- Category: Snack
- Method: No-Bake
- Cuisine: Healthy American
Nutrition
- Serving Size: 1 portion (approximately 4 ounces)
- Calories: 35 kcal
- Sugar: 1g
- Sodium: 20mg
- Fat: 0g
- Saturated Fat: 0g
- Unsaturated Fat: 0g
- Trans Fat: 0g
- Carbohydrates: 2g
- Fiber: 0g
- Protein: 7g
- Cholesterol: 0mg
Keywords: bariatric gelatin recipe, bariatric diet, weight loss snack, high protein dessert, post-surgery food, gut health recipe, collagen recipe, sugar-free gelatin
About Chef Peter
Chef Peter is an expert chef and nutritionist with over 15 years of experience working with bariatric patients and weight-loss clients. He specializes in creating simple, delicious recipes like this bariatric gelatin recipe that support post-surgical recovery and long-term health goals. His approach combines culinary expertise with nutritional science to help people enjoy food while achieving their wellness objectives. Learn more about Chef Peter and his work at Meta Savory.
⭐ Save This Gelatin Weight Loss Trick Recipe!
Don’t lose this bariatric gelatin recipe! Pin it to your Pinterest board, bookmark this page, or share it with your bariatric support group. This is one gelatin trick recipe you’ll want to make again and again throughout your journey.
⚕️ Medical Disclaimer
This bariatric gelatin recipe is for informational purposes only and is not medical advice. Always follow your bariatric surgical team’s specific dietary guidelines and protocols. Post-surgical dietary stages vary by program and individual needs. Consult with your surgeon, dietitian, or healthcare provider before adding any new foods to your post-operative diet. Individual results may vary.